Testing for Dead Pixels on The Oculus Quest 2 – Guide
Have you ever heard about Dead Pixels on LED and OLED screens? Well, we bet you must have if you are into the modern-day games and TV shows. It is a very inconvenient problem because a dead pixel ruins the whole mood for you.
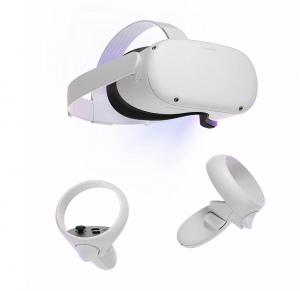
The situation gets worse when these dead pixels appear on the top of a handheld gaming console like the Nintendo Switch or Steam Deck. Also, if they crop up inside of a VR headset such as the PlayStation VR or Oculus Quest 2 then they situation gets out of control.
People who haven’t experienced gaming on a wide range of devices may not be able to understand the exact meaning of a dead pixel. You must consider yourself lucky if you haven’t heard about it.
However, we still believe that running into a dead pixel is almost inevitable at some point for everyone. They tend to surprise you when you are least expecting them. Even a freshly unpackaged device can give you dead pixels upon its unboxing.
It is important to mention that a single discolored pixel can have a massive negative effect on your overall Oculus Quest VR experience. It may be completely annoying and you need a thorough testing to know the exact numbers of dead pixels.
The Oculus Browser Testing:
If you are not sure about your Oculus Quest 2 getting a piece of dust inside its lens or falling for a potential dead pixel, then there is a way to test the theory through the Oculus web browser.
- Step 1:
You need to log into your Oculus Quest 2 through any way possible. It is always good to set up a passcode. Do it now if you haven’t already.
- Step 2:
Navigate through to the Oculus Browser application. Visit the URL “http://www.immersha.com/webvr/vr-pixel-test.html” point and click on the mask icon on the bottom right corner of the display.
- Step 3:
Now you need to set the VR mode to 3D 360. Just watch the solid colors shifting between each bright color in the circulation, therefore; getting a solid overview of which pixels are stuck in which colors.
- Step 4:
Now check out the dark blots our ultra-light dots in your peripheral vision that stick out like microscopic sore thumbs. There is a huge chance that these might be the dead pixels. Also, you need to remember to close each eye individually so you can get the best view in each lens.
Finding the dead pixel:
As of now, we feel that fixing a dead pixel by yourself is not a recommended option for Oculus Quest 2 headset owners. There are lots of videos on the internet suggesting the full process, however; we are not sure about the authenticity of it. You can go through them as per your thinking and understanding.
However, each Oculus Quest 2 is now coming with a free one-year warranty period. During this period, you should be able to take your Quest 2 back to the store and get it repaired or replaced professionally. However, it also depends on the location from where you have bought the device.